The Living Noise is an animated “flow” of particles. The particle trajectory is changed by using Perlin Noise (long live Ken Perlin!) I’m so excited. Perlin noise is used pretty much in all special effects – explosions, texture generation, water, clouds, mountains, terrain generation, twinkling stars, halo/weapon effects, etc..
Click below to see the Living Noise sample, which is just one way to use Noise:
Living Noise

Download the source code for Living Noise
Basic Explanation of Noise
If you hear about Perlin Noise for the first time, I bet you have a lot of questions like “how does it work?” and “what is it?” and maybe even “can my neighbors produce it?”
Here is my short explanation. I’m not very good at maths, thus will use my own words to describe things. If you’re math-savvy, check out Wikipedia or some scientific site out there for the exact description.
Perlin Noise is a “continuous noise”. What does it mean?
- It’s noise, meaning that it appears to be random in nature. E.g. If you have a function color=Noise(x,y) and plot this on a picture, you’ll get random dots (or “noise”) everywhere!
- It’s continuous, meaning that it looks “smooth” when plotted on a surface (no “hard edges”)
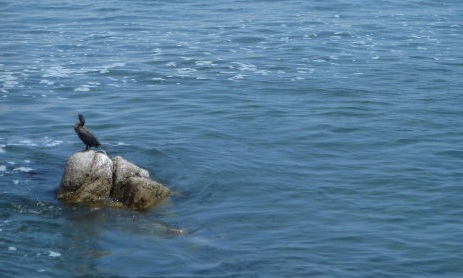
The “continuous” part is very important! As you probably noticed, in nature things doesn’t just jump up-and-down, but look smooth and “continuous”. Take water for example: if you look at ocean waves, they do look kind of random, but at the same time they look smooth as well:
The Noise() function looks like this:
value = Noise(x, y, z)
Where value would typically be (depends on who implements it) between -1 and 1
The above noise is 3D because its function has 3 parameters: x, y, and z. There are also 1-D noise, 2-D noise, 4-D noise and so on.
For the Living Noise sample, I just need 2D but I implemented the 3D version for fun. It’s also slower, so if you’re using only 2D, don’t run the 3D version “just because” as I did.
Now is the time to look at how a 3D noise looks like. Take a look at this external sample, showing a 3d noise on a 2d surface. The Z coordinate means “time” in that sample, so you’ll see nice animated noise that looks like clouds a little bit J If you also read here you’ll better understand the meaning of “frequency”, “amplitude” and the other parameters as well.
Using Perlin Noise To Make Living Noise
By now you should be familiar with Perlin Noise and continuous noise. If you’re not please drop me a comment so I can explain it better
Imagine a dot (or “particle”) on the screen. Let’s give our particle has some velocity (vx, vy) measured in [pixels/time], and a location (x,y). If we continuously draw the particle over time, we’ll see a straight line, which is boring and dull.
To make the particle more “interesting” we’ll modify its velocity over time as well.
Here are 3 examples of how can we modify the velocity:
- Completely random: the particle will appear to jump everywhere (mostly around where it started)
- Sinusoidal of some sort – the particle will appear to follow a sine-wave trajectory, better but not perfect…Anyone could see the motion is predictable.
- Using continuous noise: the particle could go anywhere, but smoothly. There will be no jumpiness in behavior like in the first case, or predictable motion as in the second case: Living Noise! The particle travels smoothly, because the noise function is smooth. See Basic Explanation of Noise above and the external links for more info.
First, I compute the noise and store it into an image. Storing into an image is not the best way to do it (slower), but it helped me “debug” the noise visually.
The noise is pre-computed because it doesn’t need to change over time.
On every time step (CompositionTarget.Rendering), get the particle’s location, and find how its velocity will change based on the noise (see NoiseParticle.cs)
Adding Lots of Particles
Since we can do it for one particle, we can as well do it for 3000 to get a nice “flow-like” image. We’ll also add some color to each particle to make everything more interesting.
Making It Look Good
Now we have a screenfull of particles, they look pretty impressive, but it’s still just a “neat effect” and I could say not production-ready yet.
Here’s why:
- The particles are just dots – too small and need to have quite a bit of those to make something useful
- The particles doesn’t relate to each other, e.g. if two particles are close nearby I’d like them to “light up” or something like that.
- Third, I’d like all this to be able to look “organic”, meaning I should be able to compose complex particle interaction and behavior in code-behind (not just modify opacity)
The implication from the Third requirement is the most important – it means I intentionally chose to render the scene on WritableBitmap rather than having 3000 <Image /> controls on a Silverlight surface.
It also means that everything will get slower, and we’ll have to account for that (see Making It Scale below).
I’ll use a quite “hacky” method to implement the First and Third requirement:
Modified Blur
To make a dot appear “larger” than it is, we just blur it on every frame. That’s good but only blur will provide blurry image…we really need some definition in there as well.
The solution is to blur the “screen” and overlay with “sharp” scene on every frame. This means that the longer a pixel stays on screen the blurrier it gets (you can think about the dots “dissolving” into thin air), and also definition and sharpness of newly created dots is preserved.
Interestingly enough, dots that are close to each other will provide a bigger “blur cloud” which makes for some non-trivial effect of multiple dots gathering at the same place (Second requirement)
We also need to fade the screen just a bit on every frame otherwise we’ll end up with some huge color field (which might be good for another demo).
Making It Scale
If you follow everything so far, and used the classic algorithm for Blur, you’ll end up with the Living Noise. At this point, it might be too slow. We want to make it full screen, and also have it use not-too-much CPU, so that whatever we’re doing can have extra cycles for something else (e.g. in-game AI or other effects).
Optimized Blur
The default Gaussian blur is quite slow. The hack I’m using averages the 2 horizontal neighboring pixels for each pixel on screen, to achieve horizontal blur. Then do the same vertically, to get vertical blur. The 2 combined give us the so-called “box blur”, which is much faster than Gaussian blur without any noticeable fidelity decrease for the Living noise (if you don’t believe it, try both and see for yourself).
Multithreading
The nice thing about our optimized blur is that it can easily be multi-threaded. Since many people now have at least a dual-core system, having 2 threads to compute the blur really allows us to take it full screen!
As a further optimization, you can apply the blur every second, third, or fourth frame without having the quality degrade too bad – good if your game, or whatever you’re doing doesn’t have “make Living Noise” as the primary goal.
Making It Stick To Objects
Here you’ll see how the Third requirement in “Making It Look Good” pays off.
Adding “sticky” is easy:
- Create a new WritableBitmap hitTestSurface
- Draw TextBlock or whatever you’d like the noise to “stick” to there
- When calculating the velocity over time for the particles on every frame, revert the time for particles that hit a non-zero pixel on hitTestSurface
You’re Done!
Usages Of Living Noise
These come up from the top of my head:
- Just show it on the main menu like a cool tweak
- Use it as “living ornaments” to stuff (menus again)
- Explosions
- Weird space effect
- Engine exhaust. Should be fairly easy once and you can pick your “exhaust of choice” by changing the x or y value of the start location of the exhaust)
- Holes in the fabric of space – if you create particles from a circular shape, it can look like someone tore the space time continuum
Further Noise Usage
I have not experimented a lot with these yet, but here are some ideas of what you could do with Noise in general:
- Clouds, in particular if you play with the octaves/sliding you can make clouds that appear moving towards or against you.
- If you draw a line dot by dot and modify every dot’s location based on noise you’ll likely get lightning effect
- Draw mountains by hand then modify the image with noise to add terrain artifacts. Note: there are many “noise generated terrains” out there. I’m proposing a manual + automated method to achieve best results and allow more tweaking
- Have some sin/cos movements (e.g. enemy battle ships), but modify the location of the ship using perlin noise. The ship will still move according to predictable trajectory, but it will look more interesting
- Explosions (take the Living noise example and make the particles “die” fast). Also, it would be nice to make the particles fade more the further they are from the explosion for 2 reasons: o Looks more life-like o You can ensure that the explosion stays within a certain rage (e.g. 64x64 pixels) – this allows you to render an explosion fast, without the need to go fullscreen. You can have lots of explosions that way, and maybe one big “boss” explosion
- Lava flowing down a mountain (I have yet to see this): add gravity to the Living Noise, and instead of velocity modify the particle positions. You can use the “sticky” properly of the Living Noise to have it burn around rocks and/or other objects
- Other stuff
References/Very Cool Stuff Links
Fast Blur: http://www.gamasutra.com/view/feature/3102/four_tricks_for_fast_blurring_in_.php
Rene's blog (this demo was inspired by his realtime noise, although I used another slower algorithm): http://kodierer.blogspot.com/
Rick Barazza's cool samples: http://www.cynergysystems.com/blogs/page/rickbarraza (found this from a colleague after he saw my demo)
Hope you liked this post! Please comment!